


Full Time
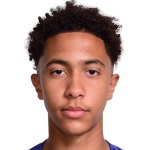
S. Martin

12

3

16

17

4

6

7

8

11

2

10

22

14
33

6

30

18

8

10

12

20

9


Line Ups
32'
63'
46'
37'60'
60'
46'
60'
Substitutes
46'
46'89'
60'
60'
Coach
79'
71'
28'50'
83'
88'
Substitutes
71'77'
83'
88'
Coach
Substitutes
Referees
Referee:
S. Martin
Cards
Match Statistics
5
Yellow Cards
3
6
Corners
5
15
Fouls
7
3
Offsides
3
59
Ball Possession
41
20
Shots
16
6
Shots on Goal
4
0
Goals
1
Latest Matches

Head to Head Matches


Blackburn
Swansea
28'
0:1
Goal
L. Cullen
Assistant: C. Patino
Yellow Card
32'
H. Carter
Handball
Yellow Card
37'
J. Rankin-Costello
Foul

Substitute
46'
In:D. Markanday
Out:C. Brittain

Substitute
46'
In:A. Moran
Out:A. Sigurðsson
50'
Yellow Card
L. Cullen
Argument
Yellow Card
60'
S. Szmodics
Foul

Substitute
60'
In:H. Leonard
Out:T. Dolan

Substitute
60'
In:A. Wharton
Out:J. Rankin-Costello
Yellow Card
63'
S. Wharton
Foul
71'
Substitute
In:J. Fulton
Out:C. Patino

77'
Yellow Card
J. Fulton
Time wasting
79'
Yellow Card
H. Ashby
Foul
83'
Substitute
In:O. Cooper
Out:J. Paterson

88'
Substitute
In:B. Cabango
Out:J. Yates
Yellow Card
89'
A. Moran
Foul
